Google Apps is a service from Google for using custom domain name with several Google products. It provides similar functionality for your domain like email, Calendar, Chat, Docs, Sites, etc. You can use free Google Apps service as well as the premium service (paid service) for the same.
By using Google Apps you can use email service for your own domain with the help of Google Apps mail servers. For that you need to update your domain MX records. To do that, you need to use your domain admin console to create Mail Exchange (MX) records that point to the Google mail servers.
Steps to Configure Google Apps :
- Go to the following link in
http://www.google.com/a/(select the process for which you want Google Apps premium or free) - OR you can directly access by using this link
https://www.google.com/a/cpanel/domain/new(if you want premium service – replace ‘domain’ with ‘premier’ in URL) 😉 - Enter the Domain name for which you want to use Google Apps.
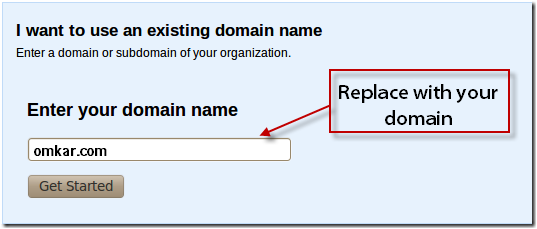
- Click on Get Started.
- You will need to fill up all the information as an Account Administrator. Then click on Continue.
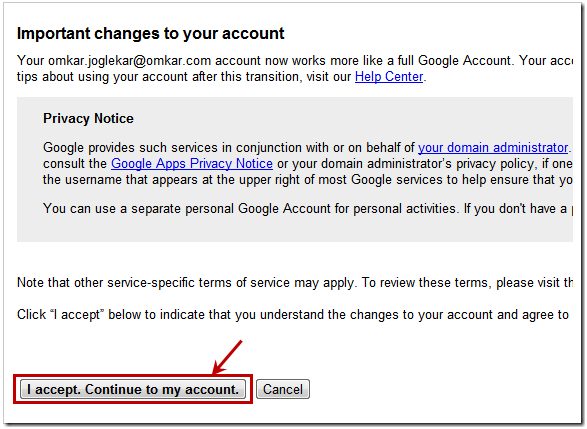
- After that you will have to create an Administrative email.
- Create Your first Administrative email account for you Domain and Click the I accept. Continue to my account button after reading the Privacy notice. 😉
- Now you are ready to sign in with admin account that you have just created.
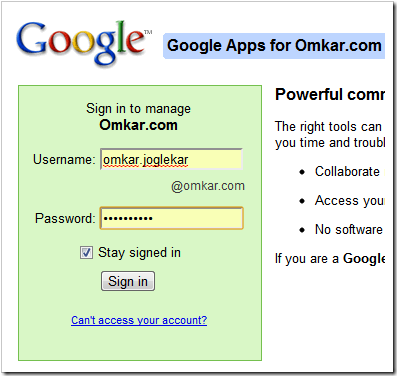
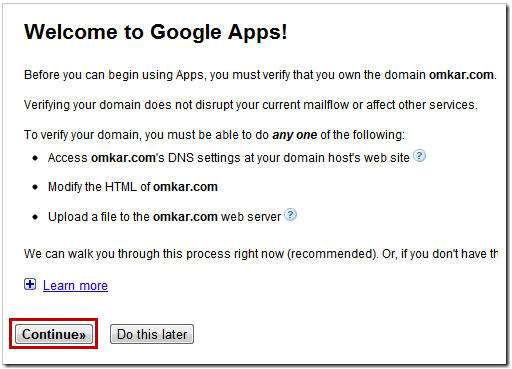
- Once you sign in to your account, you will be directed to the Google apps setup.
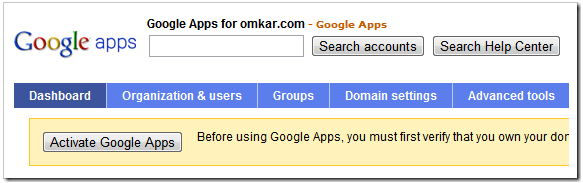
- After the Setup is complete, the Google apps dashboard will appear as below, along with Google services which you want to activate for your domain.
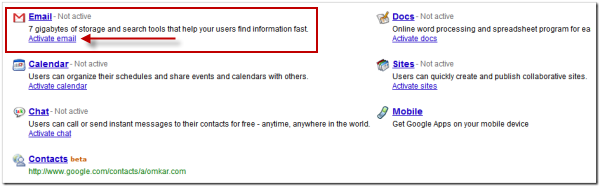
- To activate the Email service for your domain, click on Activate email as shown below.
- You can choose your domain hosting site from the drop down menu for a domain-specific user guide as shown below to setup an email service for your domain.

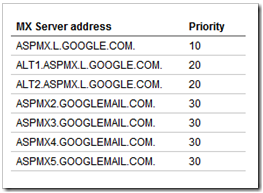
- Configure your MX records from the DNS settings of your Domain. Add the following records one by one in the MX records field.
- Once you are done changing the MX records from your Domain Setup, click on I have completed these steps.

- Google will now check your new domain configuration to setup an email service.

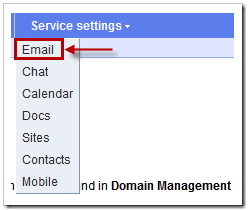
- Now, to get a custom URL for your domain email, on your Google Apps Dashboard, go to Service Settings -> Email.
- Select Custom URL as shown below, and enter your desired URL.
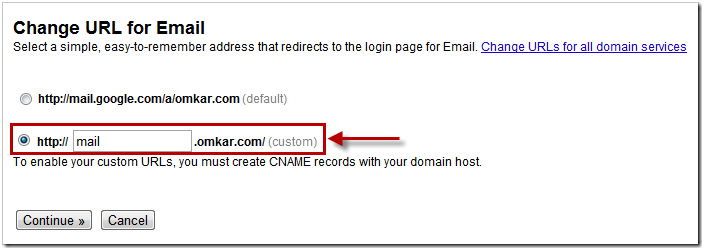
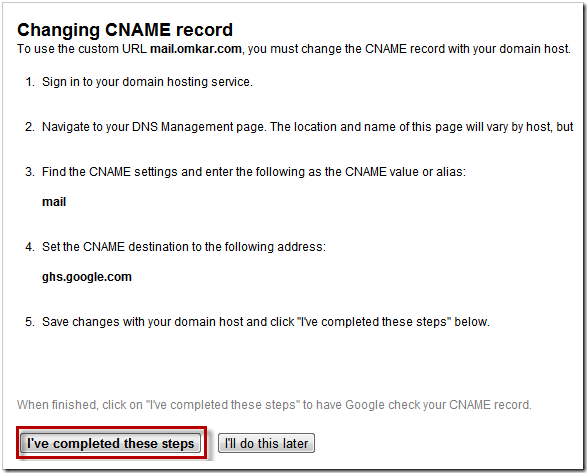
- Next, you will need to change CNAME records to setup new URL. Follow the instructions in the screenshot below, to change CNAME records.
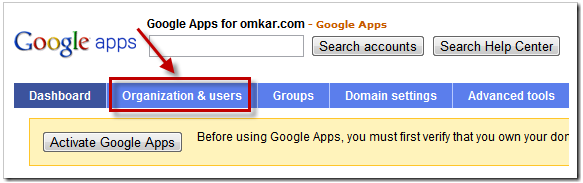
- To organize and manage your user accounts, click on Organization & users on the dashboard.
You are now done setting up an email service for your domain. Google contacts you via email to inform that the email service has been successfully setup.
Like the email service, you can activate other services such as Google Calendar, Mobile, Chat etc. for your domain. Don’t forget to drop in your comments and opinions below! 🙂