Follow these steps to setup your Blogger Domain with your ILoveThisDomain (ILTD) account.
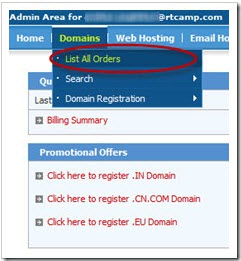
1. Log into your ILoveThisDomain and select the desired domain from the drop down ‘Products’ menu and selecting ‘List all orders’ option.
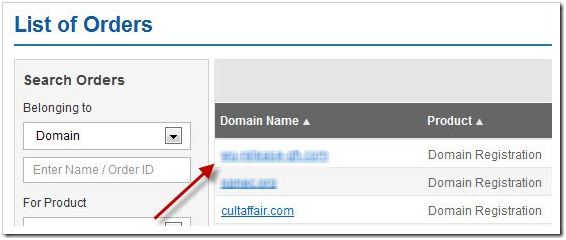
2. A list of all your available domains will appear, select the appropriate domain from the list.
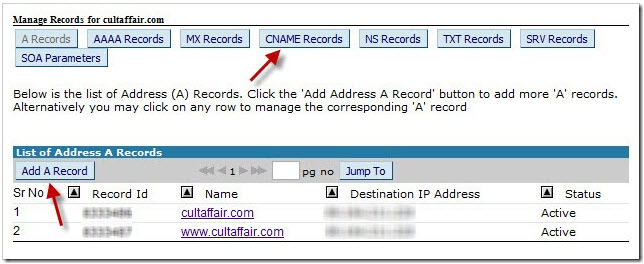
3. The information page of that particular domain will appear. From the menu at the top, select DNS Tab to configure the DNS settings.

4. Click on the Manage DNS link which follows, to edit A Records and CNAME records.
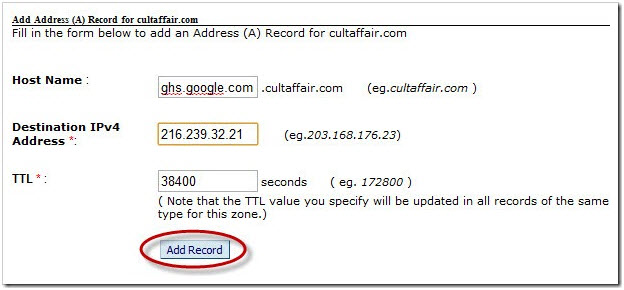
5. Click on Add ‘A’ Record and enter a sub-domain in the Host Name field or simply leave the field blank, if you want to create an A Record for your actual domain and not a sub-domain. Enter the following IP addresses in the ‘Destination IPv4 address’ field one by one:216.239.32.21
216.239.34.21
216.239.36.21
216.239.38.21
6. Add appropriate TTL (Time-To-Live) in the TTL field in seconds, and click on Add Record.
7. Now to add CNAME records, click on the CNAME Records tab.and enter www in the host name field, and ghs.google.com in the value field as shown below.

That’s it ! Now you have successfully setup your custom blogger domain on ILoveThisDomain.com.
Thanks a bunch for sharing this. I was stuck till today. Now i am sure i can cure this problem.